9. An extra thick layer is then added as a rim which
is roughly 20 mm thick. The small pot is now
complete.
10. The next step is to make the big pot. This process
is similar to the making of the small pot with a
couple of extra steps. Firstly follow steps 5 - 7
using the large mould.
11. Once the mixture has been spread evenly over the
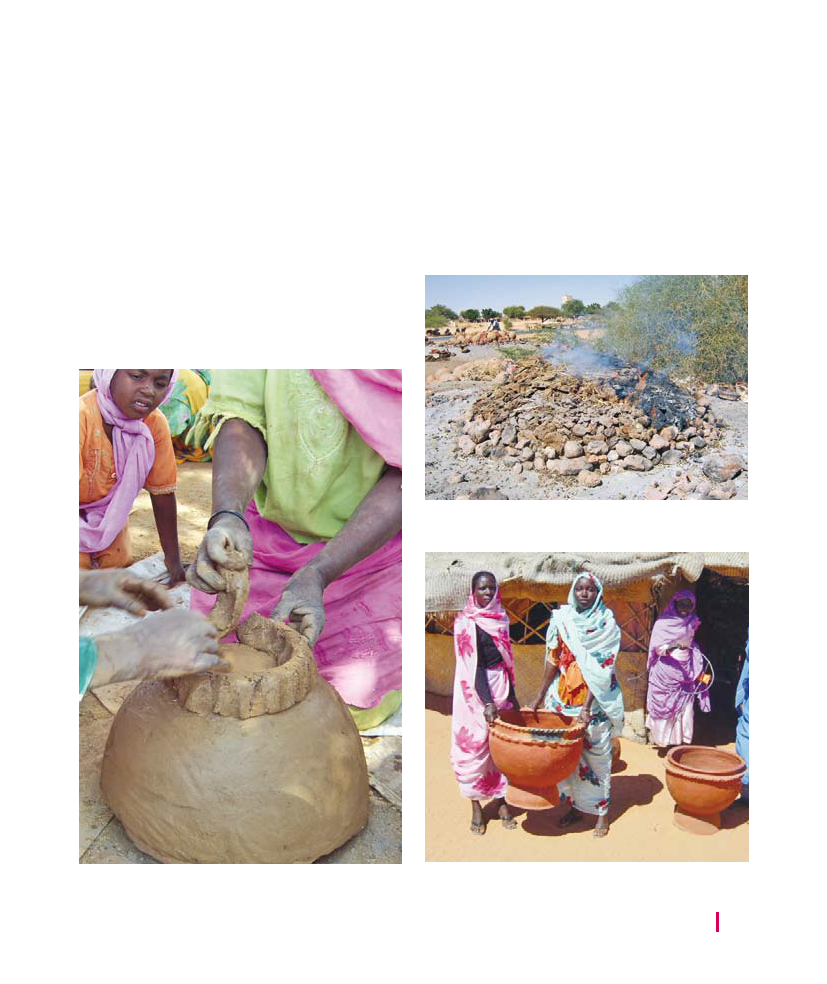
surface of the mould the base is formed using
extra mixture by hand, see picture 45.
12. The walls can now be extended to the designated
height. This is done by removing the mould and
adding clumps of the mixture by hand to the
wall.
13. An extra thick layer is then added as a rim which
is roughly 30 mm thick.
14. The final part of this process is to add the
decoration around the outside of the pot. This
is done by rolling the mixture into a long sausage
shape and sticking it around the outside of the
pot about two thirds of the way up. The pattern is
made by pressing your fingers into it. The large
pot is now complete.
15. Both pots are now left in the sun to dry. This
normally takes four days in the winter and two
days in the summer.
Pic 7. The pots are burned under a pile of rocks and cow
dung.
Pic 6. The large pot has a circular base added.
Pic 8. Ladies holding a completed large pot.
CLAY BASED
TECHNOLOGIES
17